Categories
North Cascades Climbing

North Face of Burgundy Spire, Washington Pass

The plan was do to a Paisano Burgundy link up, but nothing that day quite went according to plan. Andrew, Tim, James and I slept at the trailhead 4mi east of WA pass, and were walking by 5:45 Saturday morning. The trail starts by scrambling down past cairns to Early Winters Creek, then weaving up through the woods to the bivy camp. The camp is roomy and has excellent views of the Liberty Bell group – next time I’ll block a few more days and plan to stay here. The trail up the spires is steep, and at times the footing is poor on marbly rocks. It is relatively easy to follow with regular cairns.

As we approached the base of Paisano around 8, it became clear that we would have to wait for a few other parties to climb before our two parties of two could jump on. Weighing our priorities for the day and recognizing that a delay may mean we couldn’t complete the link up, we decided to push on to Burgundy. We scrambled up to Burgundy Col at 7720’, roughly 3600’ above Early Winters Creek.

At the col we left our bags, and started scrambling to the base of the climb. We had planned on climbing the original route that heads directly up the north face of the spire. However we struggled significantly with route finding, and ultimately opted for what now seems to be the most popular route. This option traverses right at the top of pitch two. If I described the climb how we did it, it would be a messy and confusing string of climbing, rappelling, traversing, and so on. I will instead pitch it out how I would climb the North Face of Burgundy if I were to do it again.

P1. After scrambling slightly right and up from the col, rope up where the 5th class climbing starts about 45m above the col. Climb the right facing corner on the left side of the amphitheater without swinging around to the east side. Chossy rock. 5.7

P2. Trend back right to find a crack system with numerous flakes, ending on a large ledge. 5.8

Traverse right 50m, under a large block, to a long ledge to start the third pitch.

Belay ledge for P3

P3. Easy climbing in a left facing corner, then swing right, setting up an anchor roughly 25m above the last belay. 5.5


P4. Follow a fun corner hand crack with good pro, sling a horn and belay from a small stance at 30m. 5.8

Belay stance at top of P4

P5. Trend left, stepping around a bulge into a tapering left facing crack. A move or two of offwidth then good hands higher up, and a slightly overhanging jug to pull onto the ridge. Belay from the ridge to avoid rope drag, then scramble left to the summit.

Summit ridge

Descent: Two 60m ropes made for a relatively quick decent. We doubled up to rappel climbers left of our route to the next station. Another single rappel brought us to the ledge at the bottom of the third pitch. Rather than following our ascent path, we cut left down to a rappel station just after walking back under the large block. Three more double rappels brought us back to the col.

Categories
North Cascades Climbing

Southwest Rib w variation, South Early Winters Spire

Tim and Andrew beat us to the same summit up the same route two days earlier, so David and I rolled into Monday with some helpful beta for the climb. In hopes of a warmer climb we opted for a later start, leaving from the trailhead at 7am. We followed the Blue Lake trail for 1.5mi, until the terrain opened up and we had views of the Liberty Bell group. From there we took the obvious climbers trail that branched left, headed up towards Concord tower. The trail dwindled, and we got off track trending too far left, getting almost to the base of Concord before cutting back right. A high traverse across snow brought us to the base of South Early Winters Spire.

There were two parties ahead of us, so we waited at the high ponderosa hoping the sun would come over the ridge soon. When the route cleared, we scrambled climber’s left to rack up at the Y-shaped larch.

Looking back up at the approach at the end of the day

P1. The crux pitch starts mellow, then has a few 5.8 moves to get past a bulge. Protects well. 5.8

P2. The Wavy Crack – quick climbing up onto a ledge, then follows a wide left facing crack. 5.8

P3. We opted for the 10.b variation, traversing right 20m to a left facing corner. The seam starts as tight fingers, then widens slightly toward the top of the corner. The climbing gets easier further into the pitch, but has some boulder moves higher up to get over a bulge. Once over the bulge, you’re on the Nervous Nelly pitch and can look up to Bear Hug. Climb through Nervous Nelly to the ledge below the Hug. 5.10b

P4. The Bear Hug – The hug itself is only about 5m of super fun climbing. Protection felt adequate with one 4 at the bottom, but the crack would have taken a 5 and a 6 higher up. From there traverse right to a large south facing corner ledge. 5.7

P5. Easy but exposed climbing on an arête, minimal pro. Stay on the right side of the arête to find a small belay stance before the base of the gully. 5.6

David belaying from the bottom of pitch 6

P6. Low 5th class, drop down and right into the sandy gully before the ridge steepens and would require a rap to get into the gully. Belay off a tree in the middle of the gully. 5.2


P7. From the notch at the top of the gully climb the obvious crack system right to the summit. 5.6

Summit photo for mom

Descent: Down the South Arête. At the top trend left to avoid dropping down the gully. There is a tight gently sloping chimney to descend, this awkward move is somewhat easier without a pack or rope on your back. Continue down the arêtes to the first of three rappel stations. After these rappels you are at the base of South Arête, and can walk back to the base of the Southwest Rib.

Categories
Climbing Washington Touring Mt. Rainier

Mt Rainier, Success Couloir

Success Glacier Couloir on Mount Rainier. A friend of a friend had heard about it.

Finding information on the route wasn’t easy; a google search pulled up a couple dated trip reports with helpful beta but very little to cross-reference against. Skiing down the south-facing couloir seemed straight-forward (and fun!) but climbing up was more like choose your own adventure. We chose the Kautz Cleaver for the ascent with two goals in mind: 1) ski the couloir, and 2) summit rainier via a traverse onto the Kautz Headwall.

We (David, Sam, myself) started Saturday morning from Paradise at 9:30 AM. Day One was largely a traverse taking us across the Nisqually, Wilson, Van Trump, and Kautz Glaciers. The route steepened when we got to the cleaver (35 to 45 degrees) and we ascended to 10,200 feet before taking up camp at a lovely bivy spot. For some reason this route just isn’t popular with the rainier masses, so we had the entire cleaver to ourselves Saturday. Party! A couple flasks were downed and the three of us retreated to the tent to rest up for summit day.

IMG_0864

We continued up the cleaver Sunday morning at 5 and by 7 the sun was hitting most of the route. This proved to be a big problem; around 12,000 feet we started getting hit by ice pellets, which turned to ice balls, which turned to rock, one of which flew right over my head. Good karma? Bad karma? Damnit. The reality had sunk in. Our timing was off, conditions weren’t right. The good news was we were nearing the top of the couloir. The bad news was if we wanted to summit, we still had an exposed traverse over the Kautz underneath a rimy, rocky, ridge that was also likely unloading its contents onto the slopes below. A fall would be “a bummer” in the words of David Kiker. Agreed, David.

We made the safe call to fold our hand on the summit bid and focus on the ski/board down. After a quick nap at 12,800 feet, we headed down. Snow was firm up high, with some packed powder turns, turning to corned snow between 12,000 and 9,000. We did not observe any loose wet avalanches on the way down, although the snow got very rotten around 7,000 as we descended via the Van Trump, down through comet falls and eventually onto the hikers trail. This is a fun tour that is highly recommended over two days; great steep skiing and an isolated feeling.

IMG_0916

Categories
Climbing

The Chief via Squamish Buttress

Turquoise water was white-capping on the left as a massive chunk of granite came into view on the opposite side of the road. The thousand foot walls of grey granite occasionally streaked black with lichen stood proud over the valley. This is bigger than I remember, I thought to myself. Or maybe I was just looking closer this time…

It started as it always does, with mutual acknowledgment of an open weekend and an ambition to get after it. We were looking to climb rock after a relatively low-key August. David was still riding high from his previous trip to Squamish, and I heard good things, so it was decided we would head north.

One of the most challenging aspects of climbing in Squamish is picking an objective. By some counts there are over 1,500 established rock climbs in the area. Each one has something unique to offer. Friends say do this, locals say do that, everyone says you can’t go wrong. Naturally, David and I coalesced around the most ambitious climb within our reach, the North Face of Squamish Buttress (a.k.a. Butt Light, The Butt Face). The 15-pitch climb would take us up a mountain known as The Chief by linking up multiple rock routes.

squamish_butt_overlay

Approach – We left Seattle on Friday afternoon, made a “quick” stopover in Bellingham for beers/ tacos/margaritas, and cruised into the Stawamus Chief campground at midnight. Sleep would be advised but David handed me a Kokanee (or two?) and we passed out closer to 1 AM.

We woke up at 7 AM and drove a couple minutes to the parking lot of the base of the Chief. After a coffee and energy bar, the time to leave was upon us. A quick, 10-minute scramble had us at the base of our first route, Deidre.

Route 1 – Deidre

Pitches 1 & 2 – The warm up. Both pitches were straight-forward slab climbing. 5.6/5.7

Pitch 3 – The going gets good. I lead a 25-meter pitch up a dihedral layback, very aesthetic! 5.8

Pitch 4 – David puts in a lead continuing up the dihedral. He starts bringing me up. DANGER! FALLING PHONE! Crap. The zipper on my soft shell Mountain Hardwear pant busts and my iPhone pops out, careening down the granite wall. A couple parties valiantly try to reach out for it but are unsuccessful. RIP. 5.8

IMG_8709

Pitches 5 & 6 – I lead the easy 5th pitch. David takes us to the end with an awkward move up to a tree belay. Both pitches were hard to protect. Not inspiring. 5.6, 5.8

We topped out on Deidre, but I was feeling low. Aside from pitches 3 and 4 it wasn’t very fun. The climbing was run out at times. It would only get harder from here, too. I suggested we go back to the car and find other, less committing stuff to climb. David was cool with it. We started our walk down when David pointed out the rest of the route up The Chief harmlessly saying “we’ll get it another time…” I took one look and changed my mind. Nah, let’s go for it!

Route 2 – Boomstick Crack

Pitch 7 – Boomstick crack was super fun. Still not sure I climbed it right with my hands in the crack and my feet smearing, but boy was it good. Belayed David up from the second tree. 5.6

Pitch 8 – Not needed. David went 10M up to another tree belay. I recommend linking these two pitches.

Between Boomstick and the next pitch on Squamish buttress is a well-worn path through the “Enchanted Forest”. This offered a nice reprieve from the wall for 10 minutes of walking.

IMG_8724


Route 3 – We are on it now, Squamish Buttress

Pitch 9 – Start spicy with an unprotected roof move followed by a face climb. Protection leaves something to be desired here. Drink your first beer. 5.8+

Pitches 10 through 12 – Continue generally up the ridge. The climbing is straight-forward. Nothing much to say. Low 5th

Pitch 13 – Where the wall gets vertical you have to traverse left into a gully system on the north face of the buttress. This pitch is a classic; lots of exposure but great protection. Finish on some ledges and a bolted belay station. 5.9

IMG_8732

Pitch 14 – Thank god for David. I was tired, arguably shook at this point. I asked him to lead the chimney pitch, which is the other crux of the climb, and he nailed it. He made an awkward roof move look like icing a cake. A little here. a little there. 5.8+

Pitch 15 – Zig zag to the top out on easy ledges.

In total it took us about 9 hours up. An easy walk down and a couple beers at the parking lot and life was good again. I’m proud of David and myself for knocking this one out, when we could have easily given up. On a related note, I’m moving to Squamish.

IMG_8763

Categories
Climbing Stevens Pass

Prusik Peak, West Ridge

The great debate, skiing vs snowboarding, Hillary vs. Trump, is OJ Simpson innocent? And then the big one; to approach Prusik Peak from Snow Lake or from Colchuck Lake. Certainly there are merits to both but in this increasingly partisan world, people have picked their approach and climbing teams all over the Northwest and beyond have been ripped apart by their inability to see the other side.

On one hand you have Colchuck Lake; less mileage and slightly less elevation but a grueling climb up Asgard Pass gaining 2200ft in less than a mile. On the other hand Snow Lake; nearly 6 miles longer but a much more gradual elevation gain, a well marked trail and significantly less snow and ice this time of year.

Fortunately Whitney and I are rarely consumed by such mindless bickering so after weighing our options carefully, I won and we went from Snow Lake.

IMG_8198

Personally, I wasn’t keen on trying to tick this one off in a day, but we didn’t like our chances for getting a permit in the Core Zone so Whitney suggested we just go for it. So we did, starting out from the trailhead at 5:15am. The spillway at Snow Lake was running about ankle high when we crossed at 8am, stopped at Lake Viviane for an early lunch and made the turn off to Prusik Pass at 11. From here the trip gets better.

IMG_8200

The snow is patchy beginning in the upper lakes becoming fairly consistant by the time you hit Perfection Lake. Trying to find the high point on Prusik Pass we lost the climbers trail in the snow and started on the route a little early. In this way we got an extra pitch in on some mossy rock that wanted climbing. No doubt we are not the first climbers to climb this desperate crack. From there the climb was as follows.

Pitch 1

The longest pitch, it ran through just about all 70 meters of the rope but its fairly soft climbing trending left until you hit the ledge.

IMG_8209

Pitch 2

This one was a quicky. You jump over to the north side and up a short slab until you hit the piton and slingable block right before the crux.

Pitch 3

The crux is really only 3 frictiony moves that feel exposed because theres nowhere to protect. Whitney clipped the piton and pulled the crux like a pull tab. From there, climb high and right traversing the south side with excellent exposure, until you hit the notch and then back over to the north side. Communication was a little tough here and rope drag was bringing us down so we stopped to belay.

IMG_2698

Pitch 4/5

From here you scoot out onto a series of wide ledges back on the north side. They can really just be done as a casual scramble to set you up at the bottom of the final pitch. This is where the climbing gets really jazzy. Climb up a dihedral on the left then move right to a big lay back flake. We skipped the obvious wide crack directly above and instead climbed right around the corner to two smaller chimneys to make the summit at 4pm.

IMG_8215

From the top it is 5 raps down the north side to the base. We traversed back around to where we stashed our gear at the start and were on our way out by 530pm.

IMG_2706

We hit Snow Lake at 8pm. Nada Lake at 830pm. Car at 1050pm. The last couple miles were dark and pretty slow. A brutally long day but an absolutely classic climb, for hotdog and hamburger lovers alike. Next time we’ll try it from Colchuck.

Categories
Climbing

Cutthroat Wall, Easy Getaway: No Surrender

20 years from now, Sam and I will say we were there, there at the birth of a classic… I’d be lying if I claimed that thought was going through my head as I down-climbed towards the middle of pitch two after an ill conceived foray and subsequent fall in lichen laden territory on the Cutthroat Wall. As Sam belayed from above, and I placed gear on our retreat, the team next door was rapping after two pitches on Perfect Crime (5.9). Was Easy Getaway (5.9) an instant classic?

To answer this question, I must draw upon my extensive knowledge of Washington multi-pitch alpine routes of the grade. To be frank, I’ve climbed one other, Outer Space, which is an indisputable classic of West Coast rock. After the classic, I know what it takes. Sustained, steep, splitter. I’ve been on it. Case closed, right?

Easy Getaway is none of these things, not to be confused with nothing at all. It is dirty and wild and broken in a way that engenders intimacy. You can see the line up Outer Space from a mile away. On Easy Getaway, you can’t see the line for the lichen, ahem trees, when it’s six inches from your face. Crystals stud the rock in the afternoon sun while water rushes over a granite bench in the distance. Go for the rock quality, the setting and the adventure, but don’t expect a straight shot to the top.

Approach

Park at the Cutthroat Lake Trailhead a few miles east of Washington Pass. There are free campsites on the creek side, if you need a place to crash. Follow an overgrown road bed climbers left of the main trail. Cruise this for longer than you think but no further than the creek. Bushwhack up left along the path of least resistance. Trend right. The base of the wall is level with a set of broad waterfalls. The base is characterized by a large granite bench.

Disclaimer: Sam and I were off route for portions of this climb. Some of our pitches were shorter, some of them were longer than described elsewhere. Let it be a warning and an example of the merits of the route.

P1

Head up and left from the granite patio to a corner that takes pro. Cruise this towards the small roof, which is easy to send in a move over to the right. Climb up slab/crack. We belayed from a horizontal crack at the base of block. Probably could have ended earlier.

P2

Lead up and right from the belay into a clean orange corner. Beware, the corner continues with nice, albeit filled in, cracks to the base of a block above. Don’t go that way. Head right out of the corner shortly after you enter it.

We overshot the corner and had to down climb back to the top of P2.

P3

Really nice layback crack on this one.

P4

Up and right to the small overhang (1 or 2 moves). Ride the corner all the way to where it dead ends in the overhang. Undercling and step out along horizontal cracks that lead out of the corner. We belayed at a small tree right at the exit.

Sam climbs towards the first root, headed into the Zebra Corner.

P5

Sam took a burly lead through dirty slab up and right from the belay. I’m pretty sure we were off route here, but he did a great job. Great hand cracks up to a tree belay.

P6

More fun and engaging climbing up through a deep blocky crack. I managed to squirm my way up the left crack. Sam found face features just left of the block system that got him through. Easy climbing as high as rope length/drag will allow.

Descent

Scramble up and to the right from the top of your last pitch if it’s not too hairy. Contour around until the head of a gully with a rap station. Rap. Sam found an old rope jammed in the chockstone at the end of the first bench. Our 60m rope didn’t get us all the way. We rapped again from cordellette and an old biner at the second bench.

The scramble down from here is steep and loose. It funnels into a bedrock gully where it’s quite easy to release rocks. I wouldn’t want to do this with people above or below. Pinball alley.

Categories
Climbing

Snow Creek Wall, Outer Space

What originally was planned as a weekend mission out to climb Leavenworth, became a day trip to do Outer Space when the weather went sideways. Turns out we missed a nasty day on Saturday too. The guy at the shop in town said “it just doesn’t rain like that here often”. However by Sunday it had all blown through so we cruised out there to take advantage of the second longest day of 2016.

We left Seattle a little after 8am arriving in the Snow Creek parking lot about 1030am. We were on the trail by 11am. It took us about 50 min to get to the cut off to cross Snow Creek. The trail cuts left after crossing the creek, goes over some logs and then joins a well worn path up the hill to the base of the wall. We skipped that though, in favor of a bushwhack up the right side until we got worn out and traversed over to the base of the route.

IMG_8132

There were probably 3 or 4 teams on the wall when we arrived but it moves fairly quickly and we didn’t have to wait long to get going. We started on the Remorse variation, to the left of the vegetated gully. It sort of just meanders left until you hit the ledge just within earshot and almost a full 70 meters of rope out. From there the second pitch climbs the ramp to the right straight up the the Two Tree ledge and joins with Outer Space proper.

IMG_8128

From here we found our groove and knocked off the crux pitch up to the short pedestal ledge where we sat and thought about climbing while we let a couple of faster local dudes pass us. They were nice about it though and despite going ahead, they left some rock for us to climb.

From there it is two pitches of a steep, splitter hand crack to the top. The crack is only interrupted once at the start of the final pitch with a bit of a tough move, stepping left off of the belay ledge and using a finger crack and a couple of far left knobs.

IMG_8113

We topped out a bit before 7pm and rushed down to beat the light. The walk off sucks big time but it is well marked so I guess whatever. I think we were back at the base of the wall by 8pm and back at the car by 930pm. Over all a great climb, a classic route and a very long day.

IMG_8121

Categories
North Cascades Climbing Touring

Mt. Shuksan, North Face

Summary

They told us the approach would be hell this late in the season. It was, but we’ll never admit it.

The Details

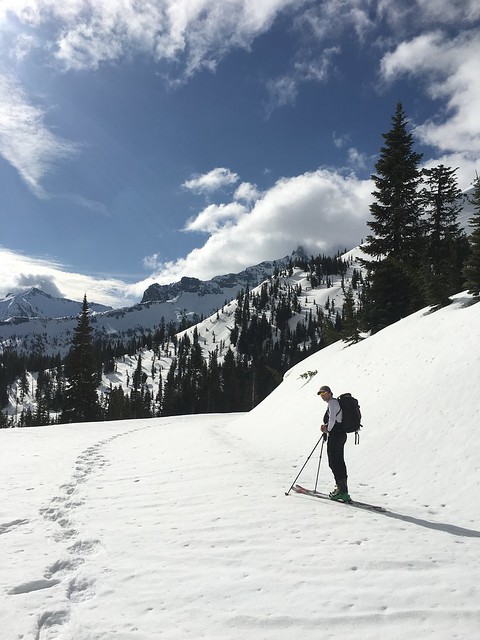
Car to Base of White Salmon Glacier, 4:00-7:15

We parked at the gate to White Salmon Lodge, left the car at 4am and walked the road past the lodge to the base of Chair 8.
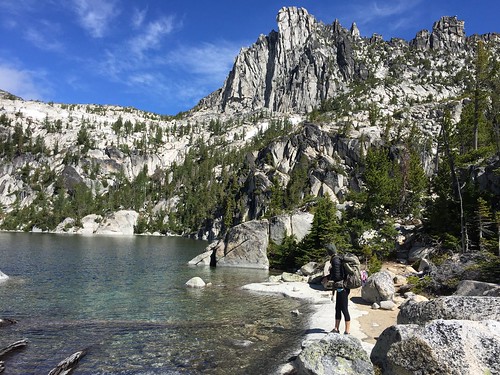
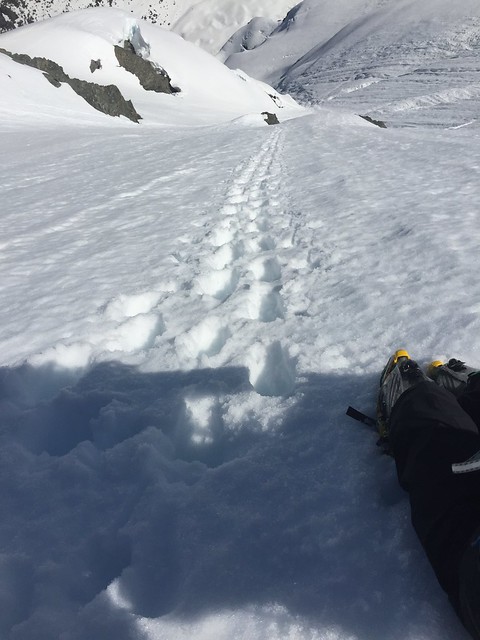
There was plenty of snow. Material online and on paper described two ways forward from here. The first has you traverse along Shuksan Arm, maintain elevation where you can and generally avoid the dense brush in the valley. The second has you drop immediately from Chair 8 through an old clear cut to the valley floor. We went with option one and found a suitable place to cross the first (of many creeks) several hundred feet upstream. In general, our route from here maintained elevation along the Arm. We did a fine job, but sloppy snow, cliff bands and creeks made progress relatively slow. This approach worked well, though would have been better with more snow. We felt smug as hell on the open slopes below Shuksan. Where was all the alder we’d been warned about? Naysayers be damned!

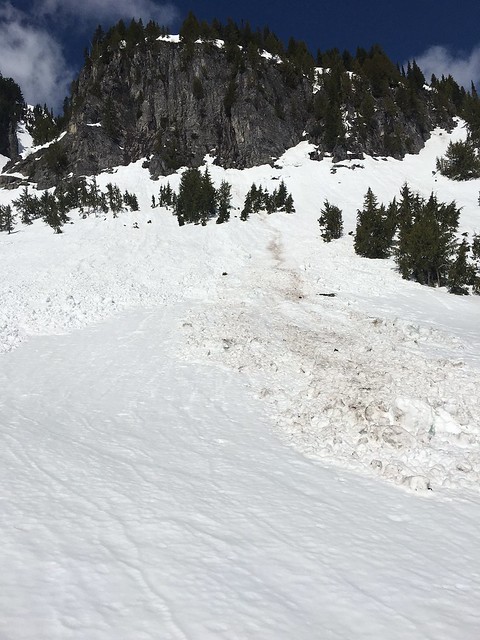
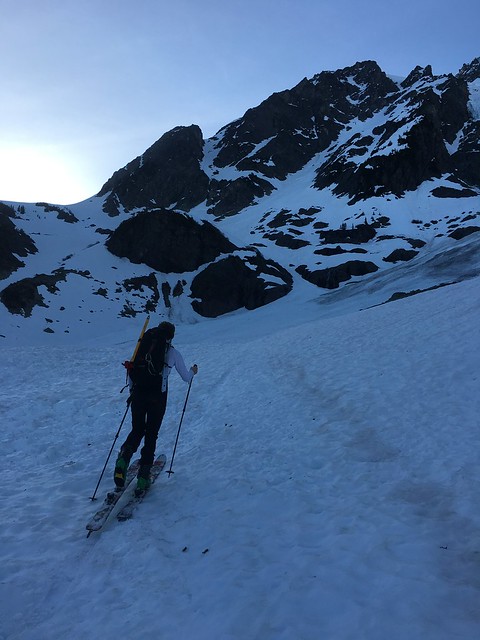
Open Slopes to Base of NF, 7:15-9:00

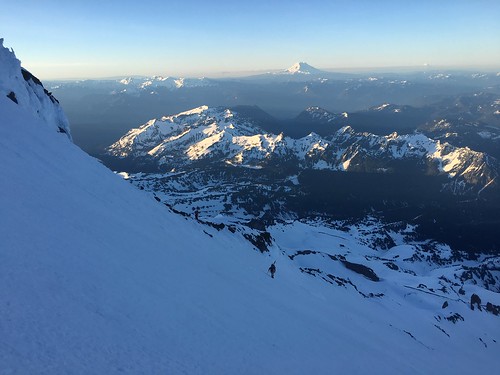
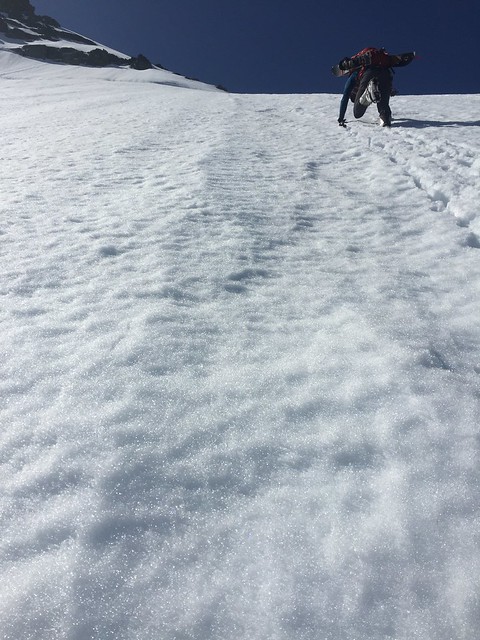
With plenty of light, and a clear view of the saddle below the NF, we picked up the pace of travel. The debris field beneath the Hanging Glacier impresses the power of the mountain upon the observer. Don’t mess around.

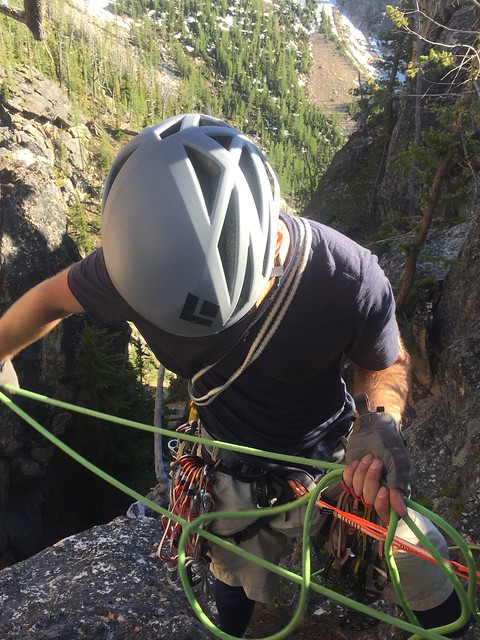
We trended climber’s right and wrapped up and around a large rock outcropping in the path to the saddle. In retrospect, trending climber’s left  might have been more efficient, especially with more coverage. The snow surface was variable. Frozen and hard in some places, and soft in others. Wet skins and loose corn eventually brought us to the saddle. We had a quick snack, donned harness and threw skis on our packs.

Traverse from Saddle to NF, 9:15-9:45

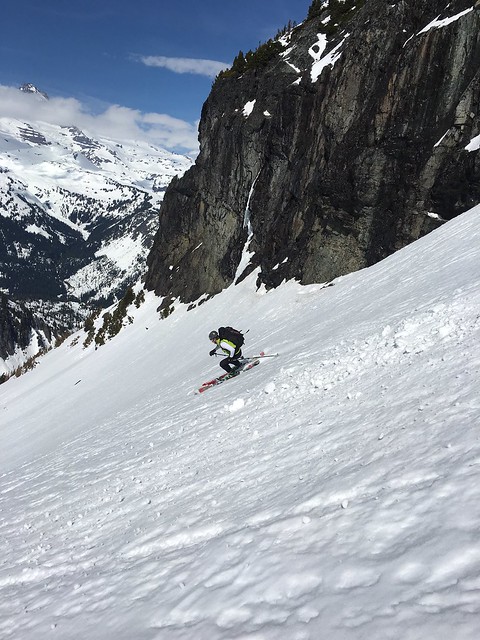
We were roughly an hour behind schedule, but decided to push out toward the face. This section has a lot of exposure. Cliffs rise to your right, and Price Lake is visible several thousand feet below. The slope isn’t that steep but it left me on edge. At this point, we were pretty concerned with the quality of the snow. It was wet and soft to a depth of 10-15 inches. Even though this section had received sun for several hours, it was clear it hadn’t frozen the night before. As boots displaced snow, we kept a very close eye on the progress of rollers down slope. They didn’t entrain other snow, generally broke up a dozen feet below us. We proceeded with caution into the hot sun.

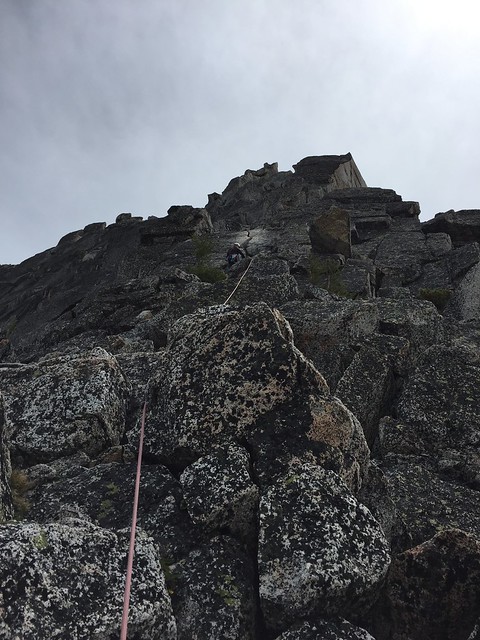
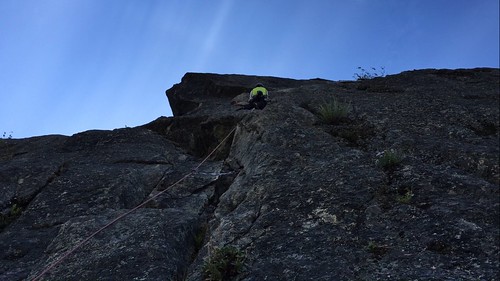
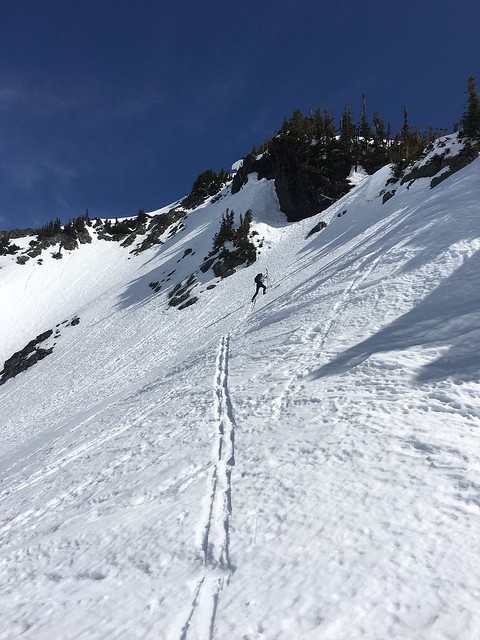
NF Ascent, 9:45-12:45

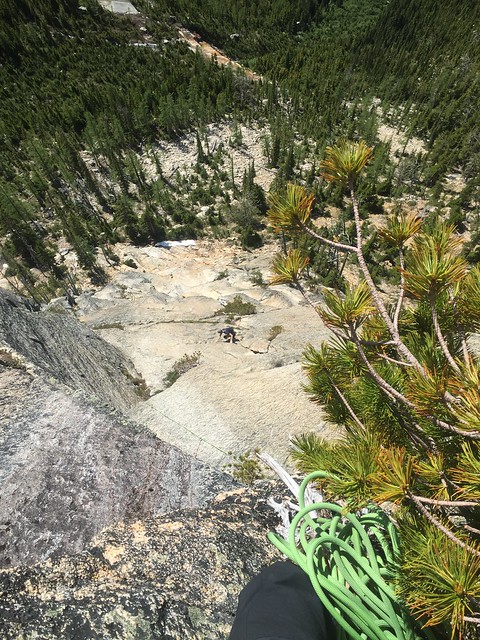
Tim and I took stock of the line, and the terrain we just crossed. We acknowledged that we didn’t want to retreat along the traverse later in the day given continued solar affects. We committed to topping out. The first 500 feet had some large cracks. We navigated them without too much trouble and avoided the main runnel that runs down the face wherever possible. One can see exposed rock above, and the lines written by releases of yesterday.

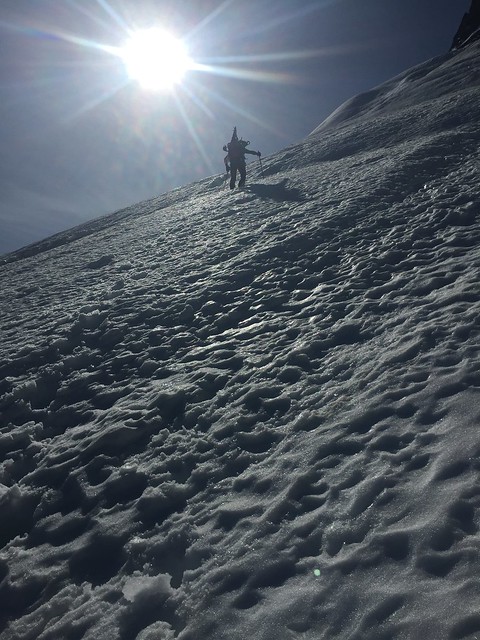
We trended climber’s right and at about 6,900 ft (10:45) passed through a notch between two rocks. At this point, exposure from cliffs above the lower face decreased. We took a deep breath and established a rhythm as snow firmness increased with elevation gain.

It’s worth noting that this section of the climb is steeper and receives less early morning sun this time of year. The breeze picked up as well. Tim set a g-o-r-geous boot pack in firm conditions on the upper face. I wished I had a second ice tool.

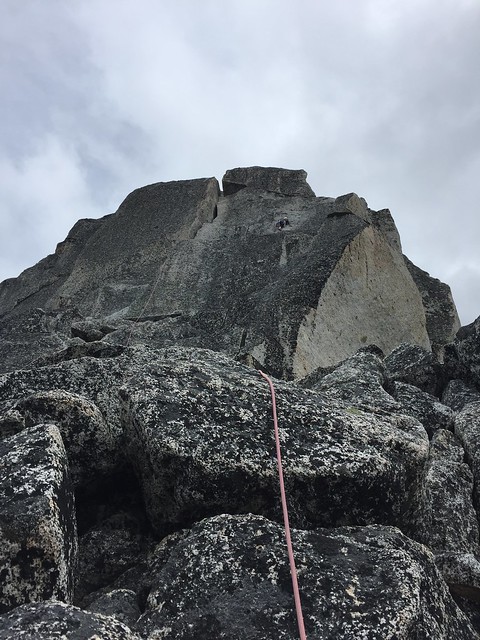
Lunch & Options, 12:45-14:00

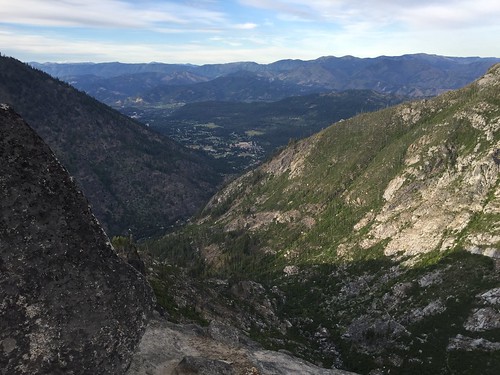
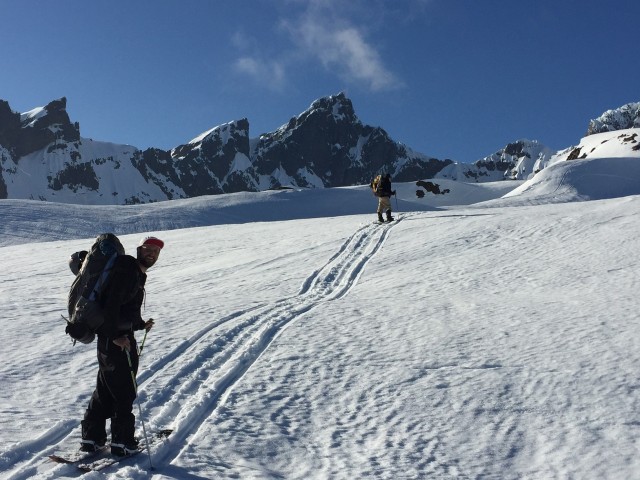
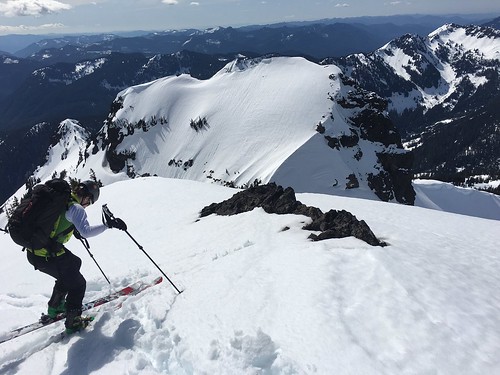
The rock that borders the top of the climb make an excellent lunch perch, with astounding views to Price Lake and the valley below… Not to mention the summit pyramid of Shuksan. When we left the car that morning, we weren’t planning to ski back down the NF. Needless to say, the climb hadn’t changed our minds. We had two (reasonable) options from here. Circumnavigate the summit pyramid (and possibly summit) or take the Hanging Glacier to the White Salmon (via the Upper Curtis). The decision was postponed until we toured up to the saddle SE of our resting place.

From here, we were able to see the upper reaches of the HG to our west and the Crystal to our south. A quick look at the time and the smooth corn to the west, and we made the easy decision to save the summit for another day. In retrospect, this was a fantastic choice.

Descent to End of Snow, 14:00-16:00

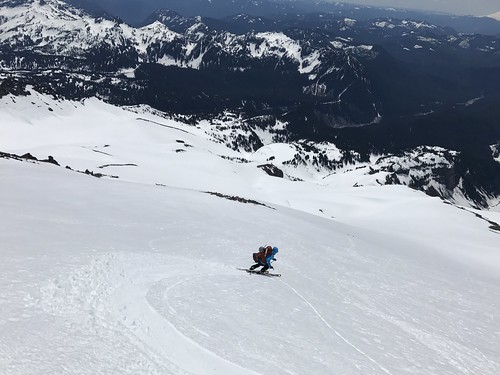
Perfect corn down the HG to the Upper Curtis. We were cautious for several reasons, the most obvious being cracks. We also didn’t want to miss the entrance to the White Salmon, somewhere to skier’s right. As we approached the ridge separating the Curtis from the White Salmon, Tim wondered if we could tour up along the Arm. Anybody know if that’s a viable route?

Our last few cuts on the Upper Curtis were a turning point in the tour. All of a sudden, loose wet became a major concern. Hot pow cut from our tracks slid slowly down the steep glacier.

At the top of the White Salmon, the snow is less exposed to the sun. We evaluated the terrain and plotted a route down. The first 500 feet were consumed boarding fall line on quality corn. There are many roll-overs, we paused atop each to avoid boxing ourselves in.

DownSalmon

The temperature increased dramatically and snow quality suffered. The remainder of the descent was spent minimizing exposure to wet loose. We traversed left across the slope toward mellower terrain, cliffs below. Nothing major released, though some slow movers plodded away.

Some good hot turns and a few short carries took use all the way to the end of snow. Phew. As we drank the last of our water and shared a final bar, our thoughts turned to open roads and full changes…


The Alder Path, 16:00-17:15

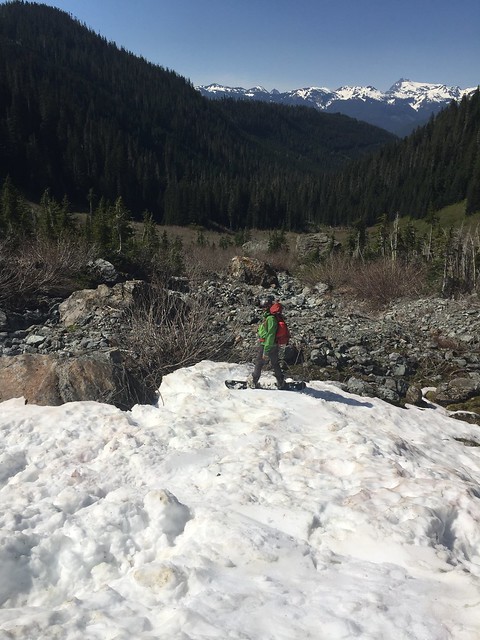
The Arm wasn’t on our list. It was hot on the way in. We knew it was a dead end on the way out. We generated a mental map of the valley, noting where we’d break up through the trees toward Chair 8. It looked close, doable in an hour.

The first 30 minutes were spent trailing creeks, reminding me why I like summer in the mountains. Then the undergrowth got thicker and thicker. In retrospect, it wasn’t too bad…

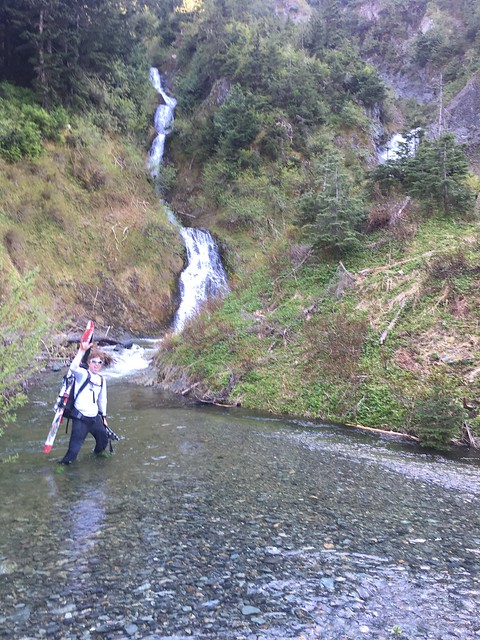
We were close, maybe 200 yards from the clear cut. The alder was thick, and we’d been up and down the creek looking for a place to cross. We back tracked to the pool below the waterfall and charged in. Drained boots on the far side, wrung out socks and swore never to admit the alder had been as bad if not worse than David claimed it would be.

We’re on it Now, 17:15-19:00

One of Tim’s many great qualities is his ability to buy in, to validate the reality and cultivate an attitude that gets you through to the other side. Coming out of the valley was tough. Tim wrestled his way up steep slopes through the trees and brush. I tagged along.

There’s not much to say about this section. Not much advice to give. I guess do it early in the season, or don’t do it at all, or just do. When we finally squeezed through the brush onto the gravel road below Chair 8, we were a thousand steps from dry feet and a big gulp of water. Amen.

Bye Bye Big Gulp, 19:00-22:45

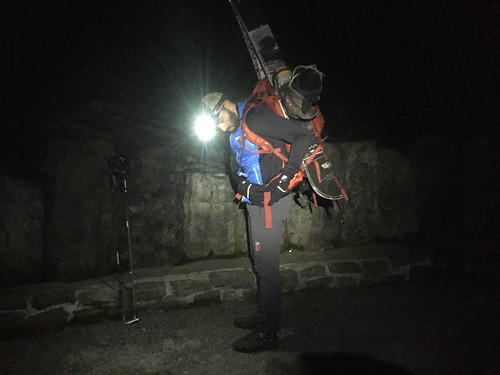
We arrived at the car triumphant, having just passed a nice couple on their way to a sunset picnic. Bags hit the pavement, I threw my ski boots off and started digging for the vest that held my keys. When I saw all 3 zippers gaping, I knew immediately. The keys were gone. All the times I’d thrown that thing around flashed before my eyes. For all I knew, they were sitting at the top of the North Face.

Bye bye big gulp. Bye bye dry shoes. We were stuck. Eli, Tim’s brother came to the rescue. After mere seconds of pleading, he agreed to drive out to pick us up. He even grabbed a spare set of car keys from my beloved housemate, Evan.

Tim and I killed the time doing laps up to White Salmon Lodge to stay warm. We ate palm fulls of crushed ritz crackers and begged water from kind motorists. By the time Eli arrived, I was fading in and out of cold sleep on the pavement. Tim was whistling to himself, mumbling about northern lights.

Categories
Climbing Mt. Baker Touring Movies

Mount Baker, Easton Glacier Route

A week of sun and 70 degree temperatures in the city will begin to induce touring withdrawal symptoms for even the heartiest of peakers. With raging monkeys clawing at our backs, we set our weekend sights for a fair-weather summit attempt of Washington’s 3rd highest mountain and stratovolcano, Mt. Baker (10,800′). The snowpack this year has been deeeep, and with summer weather forecasted for the mountain, conditions looked ‘absolutely splitter’ – to quote D.B. Kiker himself.

For Brian and I, this would be our first experience with glacier travel so a large part of the trip was educational. If you happened to be at Gasworks Park last Thursday, then yes, we were those kooks pretending to rescue each other out of imaginary crevasses in the grass.

We chose the Easton Glacier route, and Ranger reports indicated that the road was still snowed-in for about mile before the trailhead.

1:00 PM: Parked the car at 3000’ elevation, threw the splitboards into tour mode, and hit it. A large section of un-snowed dirt road about 100 yards around the first bend in the road forced us to portage the boards on our backs for a bit, but trailhead access was uneventful other than that ~ 1 hour.

Touring up the Road

** Touring the snow-covered road pre trailhead

We followed the well-defined sled trail about 1500 vertical feet from the trailhead up to the start of railroad grade, where the sled tracks broke-off into the valley above. 3:30PM

Garrett Railroad Grade

** Garrett starting up the valley – railroad grade on the left. With the snow from earlier in the week compacted and wet from the heat, the snowmobile tracks made for easy touring.

6:00PM: With daylight waning, we exited the north end of the valley, and set up camp at 6500’, just below the Easton Glacier. The night was clear and the views were spectacular.

David_Brian_Finding Camp

**Brian and David scoping out a campsite

Sunset_SanJuans

**Sunset view of the San Juans

Mountain_Night

**Night Mountain.  Roman Wall & Summit on left, Sherman Crater in middle

Camp_night

**Turning in for the night

3:00 AM – Wake-up. Clear sky allowed the temperature to drop overnight and freeze snow. A leisurely morning of pacing for warmth, hugging warm coffee mugs, and packing camp leaves us ready to hit the trail at 6AM. Splitboard crampons required.

Rope-up

**Roping-up to start the day. We ascended through the saddle to the NW (top right), then pointed directly to the Sherman Crater.

The snow was very firm throughout the morning, but splitboard crampons made short work of the first 2200’. At 9000’ the grade steepened, necessitating a switch to boot crampons and board carry to the Sherman Crater.

approaching_crater

** Approaching the Sherman Crater. Roman Wall to left. If you look real close, you can see two people (dots) just to the edge of the shadow formed by the left crater.

This early in the season there was minimal crevase exposure. Throughout the ascent and descent we saw just 2-3 open crevasses that were small and easily avoidable. Worth noting that it’s important to remember the location of these for the snowboard descent, else you end up having to do a last second emergency ollie.

11:00 AM: We stopped for a quick lunch at the crater rim

David_Brian_Crater

*David and Brian taking a breather

Garrett_Brian_Crater

**Brian and Garrett on the Sherman Crater lip

David_crater

**David contemplating the meaning of life

Crater_Smoke

** The Sherman Crater was smoking like a chimney

More_smoke

Revitalized, we cramponed our way to the summit by noon with boards on our backs. At this time of day the Roman Wall was very steep and icy – even a boot crampon ascent felt sketchy.

Obligatory summit pics:

Brian_Summit

Garrett_David_Sumit

Fearing that the bottom of the mountain would become a slushy mess, we strapped on our boards and rode down quickly after reaching the summit. In retrospect, we could’ve waited until ~1PM to descend – which would’ve made the roman wall a bit more enjoyable.

Phenomenal Corn skiing was to be had below the Sherman Glacier. Packed up camp quickly at 6500’, and snowboarded the remainder of the way out.

3:00 PM: Arrival back at the trailhead

Categories
Climbing Touring Mt. Rainier

Tatoosh, Unicorn Peak

At a certain point in early Spring, as the weather begins to warm and the sun makes more frequent appearances, us peakers find ourselves with a dilemma: should we keep ski touring or jump to the rock? But with the snow pack still deep and the sun shining strong for the last day of March – Andrew and I shot back – “why not both?”

Unicorn Peak would fit the criteria. The largest mountain in the Tatoosh Range is just a stone’s throw from Mount Rainier. It has great road access, good vertical for skiing, and a summit block that would help shake off the climbing rust.

We left Seattle at 6:30 AM and arrived at the parking lot (Narada Falls) at 9:00 AM and started our tour along Stevens Canyon Road. It is mostly flat as you pass some lakes on the left (Reflection, Louise) and the turnoffs for Castle and Pinnacle Peak on the right. After 2 miles on the road you will get your first view of the objective – Unicorn Peak.

IMG_0106

**Unicorn shrouded in the clouds**

After 3.5 miles on Stevens Canyon Road, we picked up the Snow Lake Trail. The Snow Lake Trail took us to… Snow Lake, at which point we observed significant wet-loose activity from the previous week’s warming trend. Be careful here as there are slide paths all  around the lake; I would caution against coming here with any major instability in the snow pack.

IMG_0115

**Wet loose slides above Snow Lake**

At this point the route becomes fairly straight-forward. We headed toward the gully above the lake, which spits out into a breathtaking ski bowl with 180 degrees of good skiing aspects. Shot on time, we then moved east toward the saddle between Unicorn and the unnamed summit to the southwest. The top of this is the steepest section of the tour; thankfully we had Andrew to lay it down.  Dude is a hoss.

IMG_0118

**Beast Mode Powers**

Once we topped out on the saddle, it was a ridge walk to the Unicorn summit block. At this point we got the rock gear out and made for the true summit. We took the direct 5.6 variation. It required 4 pieces of gear. There is various webbing tied to a tree at the top which you can use for an anchor. BEWARE: as I was cleaning the route, I stepped on a 2′ x 2′ boulder which completely gave way. The rock here is very porous. Actually it’s worse than that, it is disintegrating.

IMG_0126

**Andrew rappelling summit block**

We topped out at 2:00 PM, took some pics of Rainier behind our athletic, sculpted bodies, and rappelled down to the skis. We skied the line we came up on and it was gorgeous. Soft, carvable corned snow all the way back to Snow Lake where we put the skins back on and made haste for the car.

IMG_0130

**Andrew clicking in at the top**

IMG_0137

**Almost makes you want to ski…. almost**

All in all, a great day with great company, dilemmas be damned.